Part 1: Loading Data
Keboola offers various methods to load data, providing flexibility to suit different project stages. When initiating a project or conducting a Proof of Concept (POC), the quickest approach is typically manual data loading. As the project advances to production, you may transition to automatic data loading using data sources connectors.
In our tutorial, we demonstrate manual loading, and as you progress, we delve into automated data loading using connectors, specifically the Google Sheets and Database data source connectors.
Manual Data Loading
Section titled “Manual Data Loading”Get Ready
Section titled “Get Ready”In this section of the tutorial, you will load four tables into the Keboola Storage. These tables represent business opportunities, associated users and accounts, and specified company levels for each user. The tables are available as CSV files for download:
- Opportunity (business opportunities)
- Account (associated accounts)
- User (associated users)
- Level (company levels)
Download these small files to your computer and proceed with loading the data.
Steps to Follow
Section titled “Steps to Follow”-
Before proceeding, ensure you are logged into your Keboola project (refer to the tutorial Prerequisites if you need to acquire a project).
-
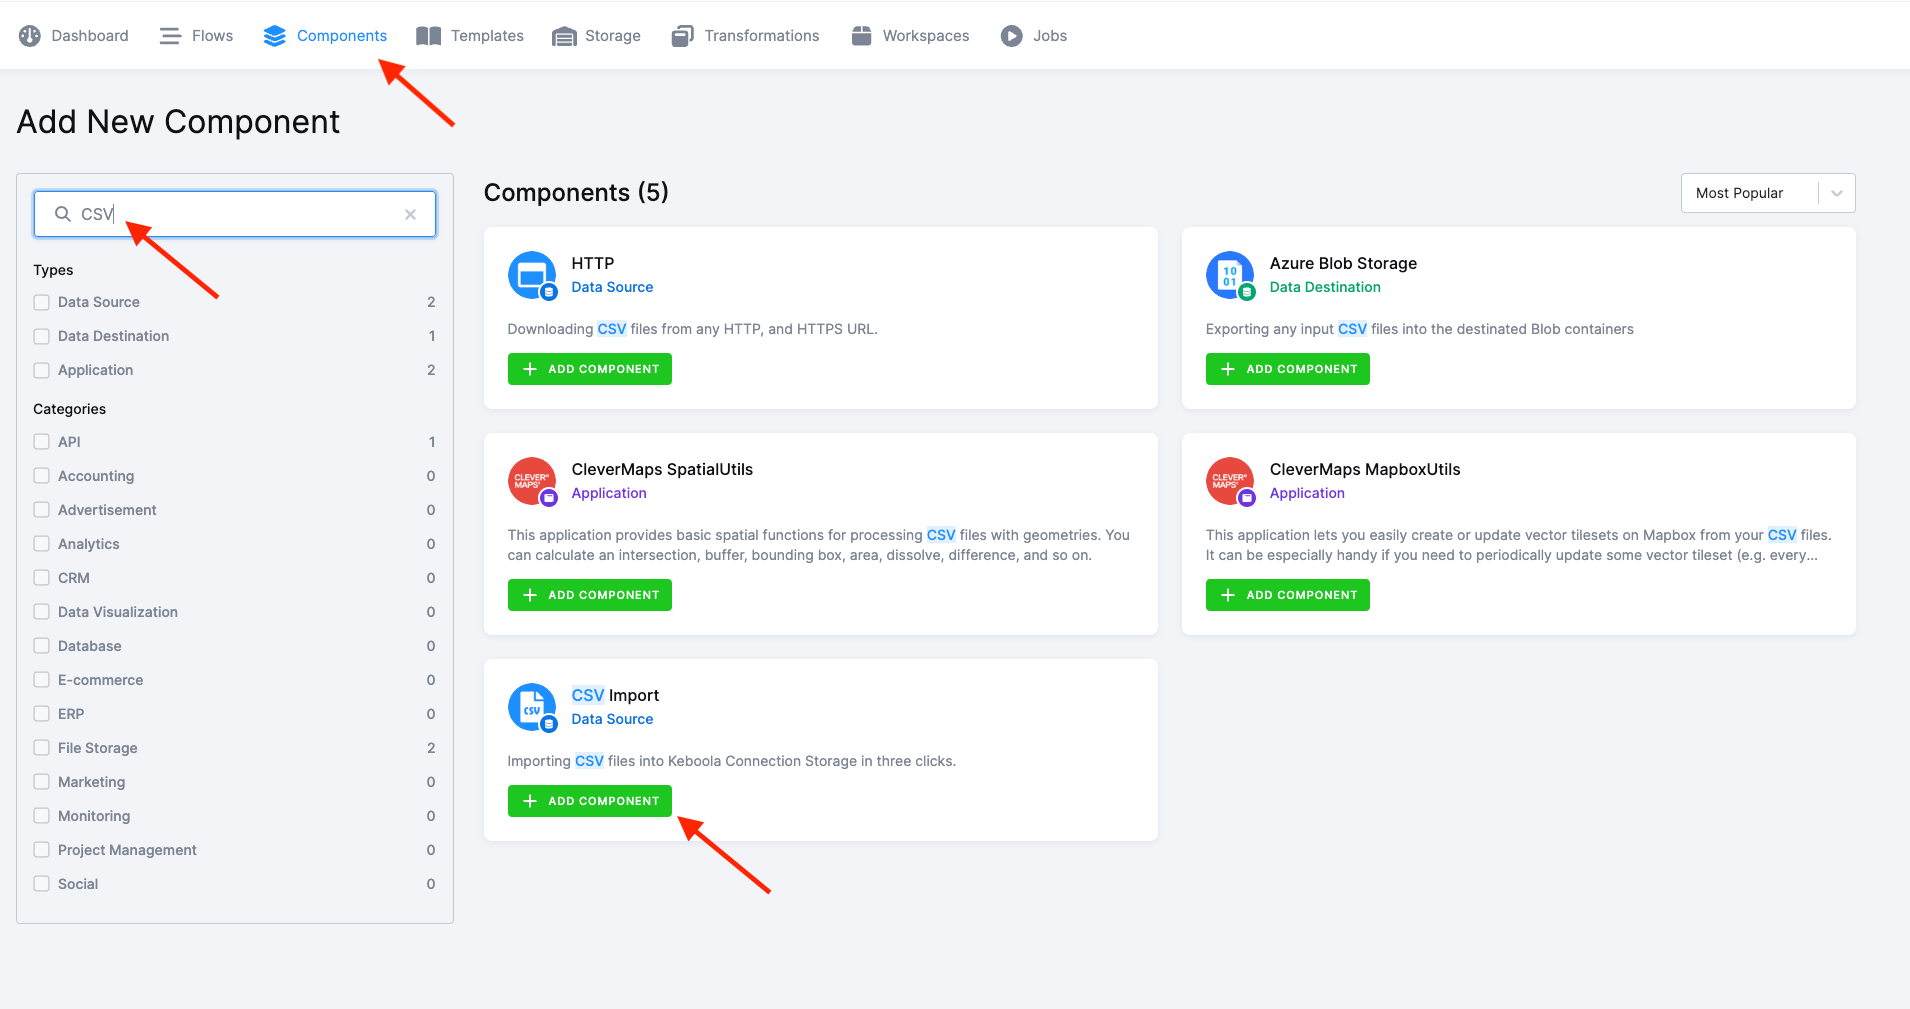
Navigate to the Components section and use the search box to find CSV Import.
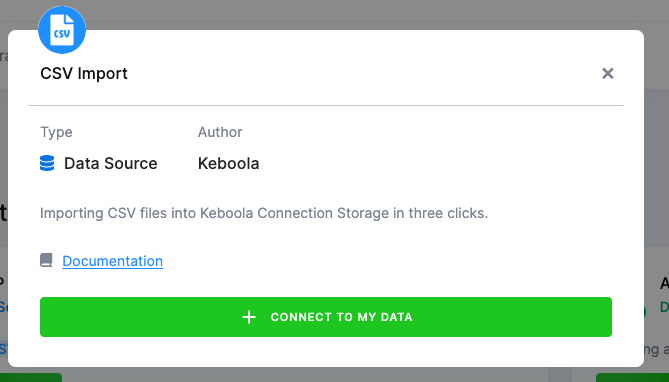
- Click theAdd Component button, then select Connect To My Data.
- Enter a name and description for your configuration, and click Create Configuration.
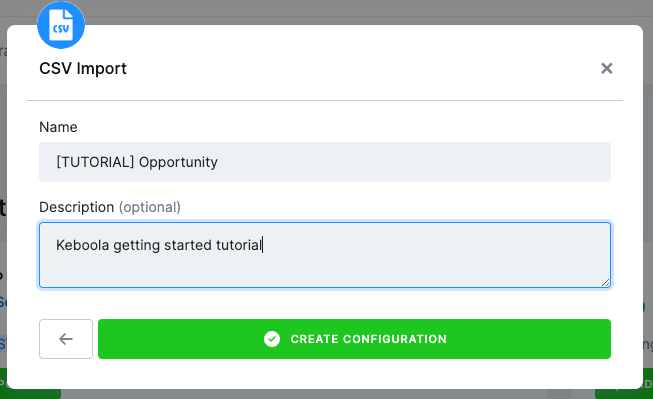
Adding a description is a beneficial practice for both you and your colleagues, aiding in understanding the purpose of your configuration.”
In this tutorial, we will create four configurations for this data source connector, dedicating one configuration to each source CSV file.
Name the first configuration [TUTORIAL] Opportunity.
- In the CSV File section, click Select file and choose the opportunity.csv file you downloaded.
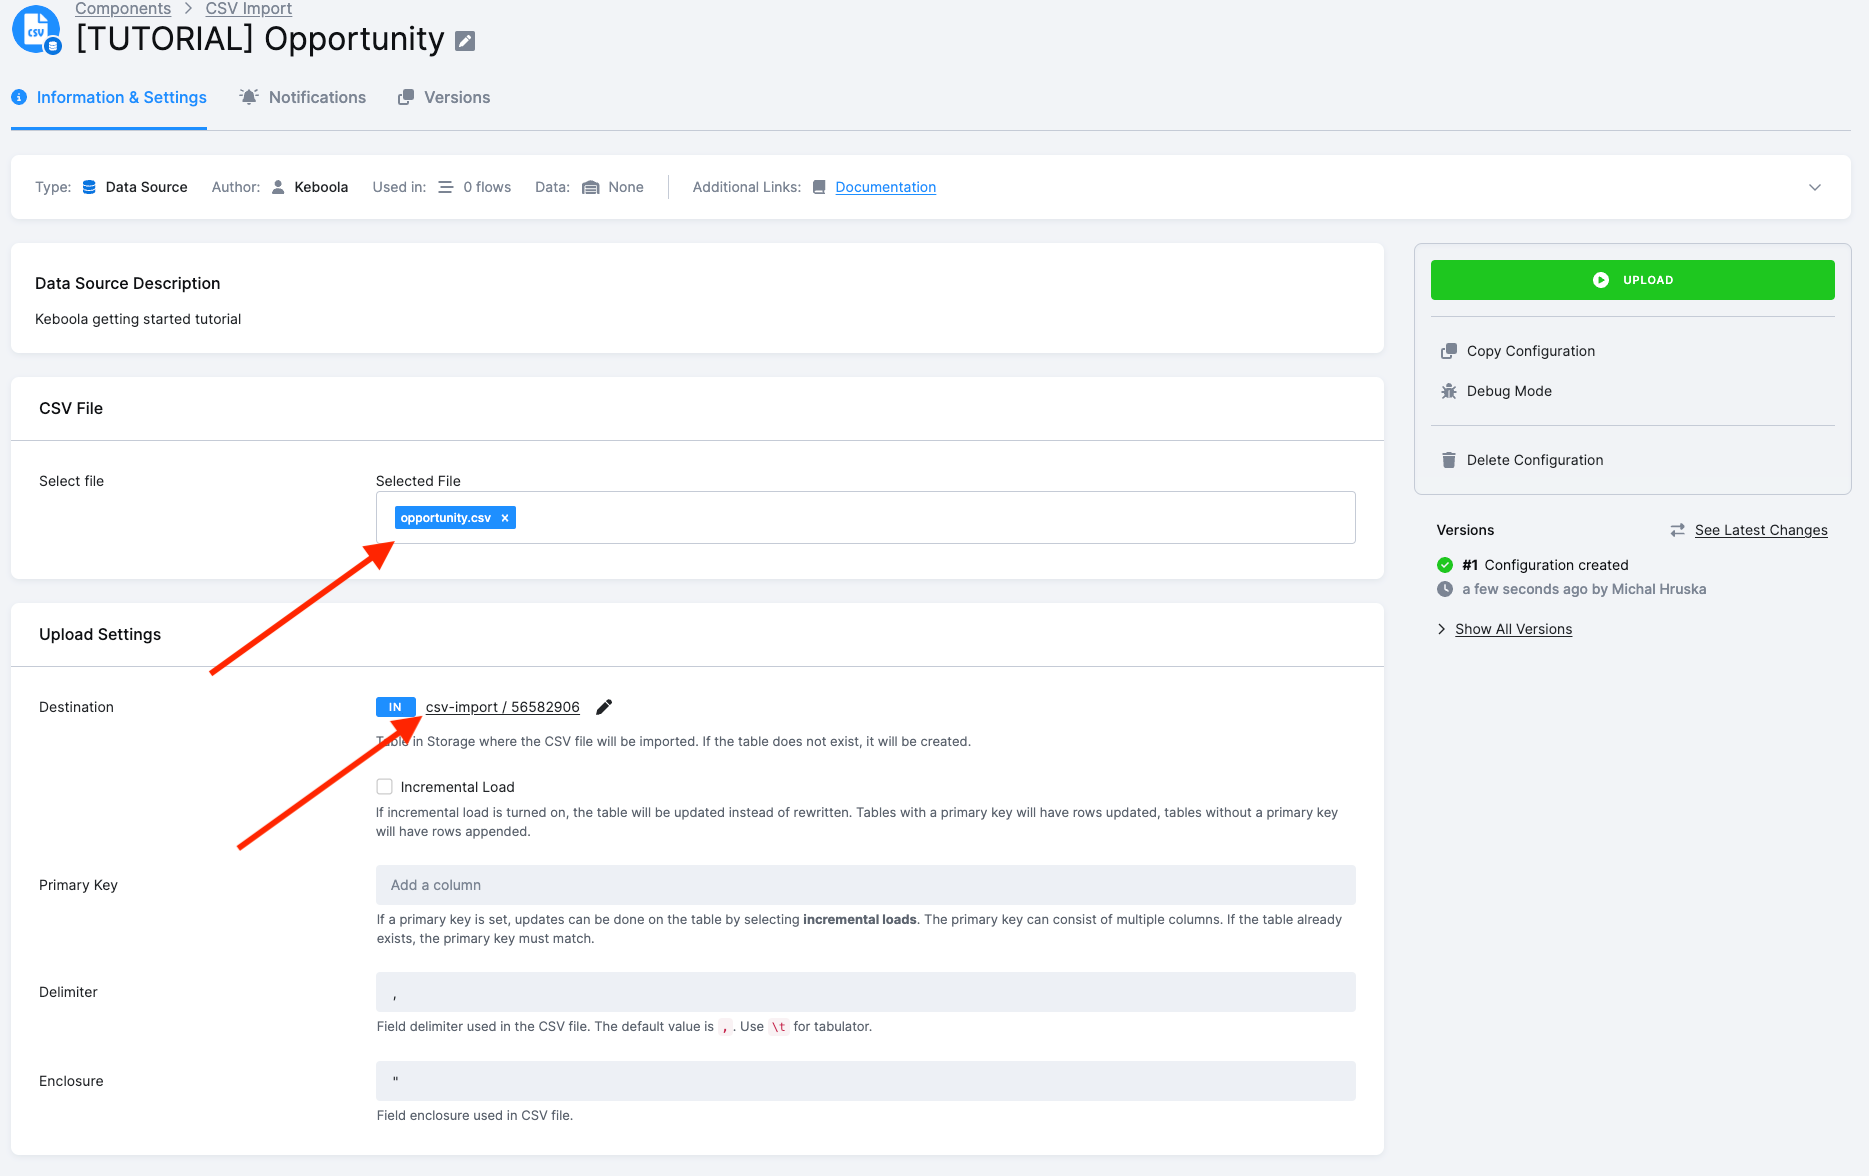
- In the Upload Settings section, modify the Destination setting by clicking the pen icon next to the Destination name. Set the name of the table that will be created in your Keboola Storage to
in.c-csv-import.opportunityand click Save.
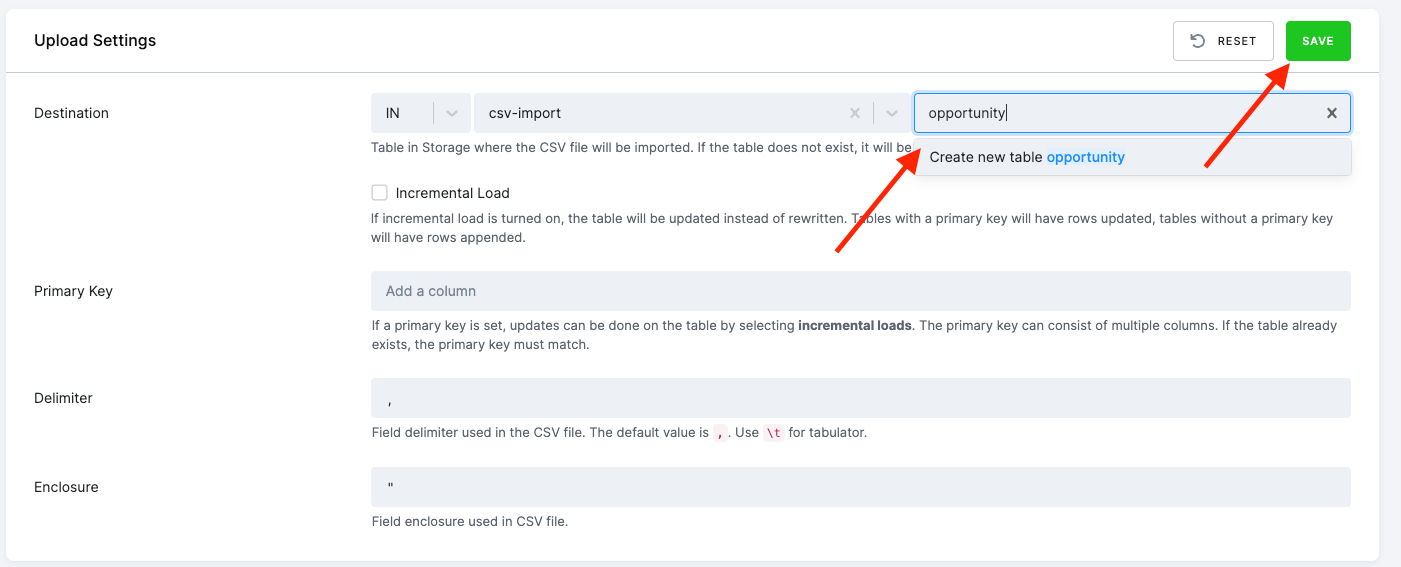
- Click Upload.
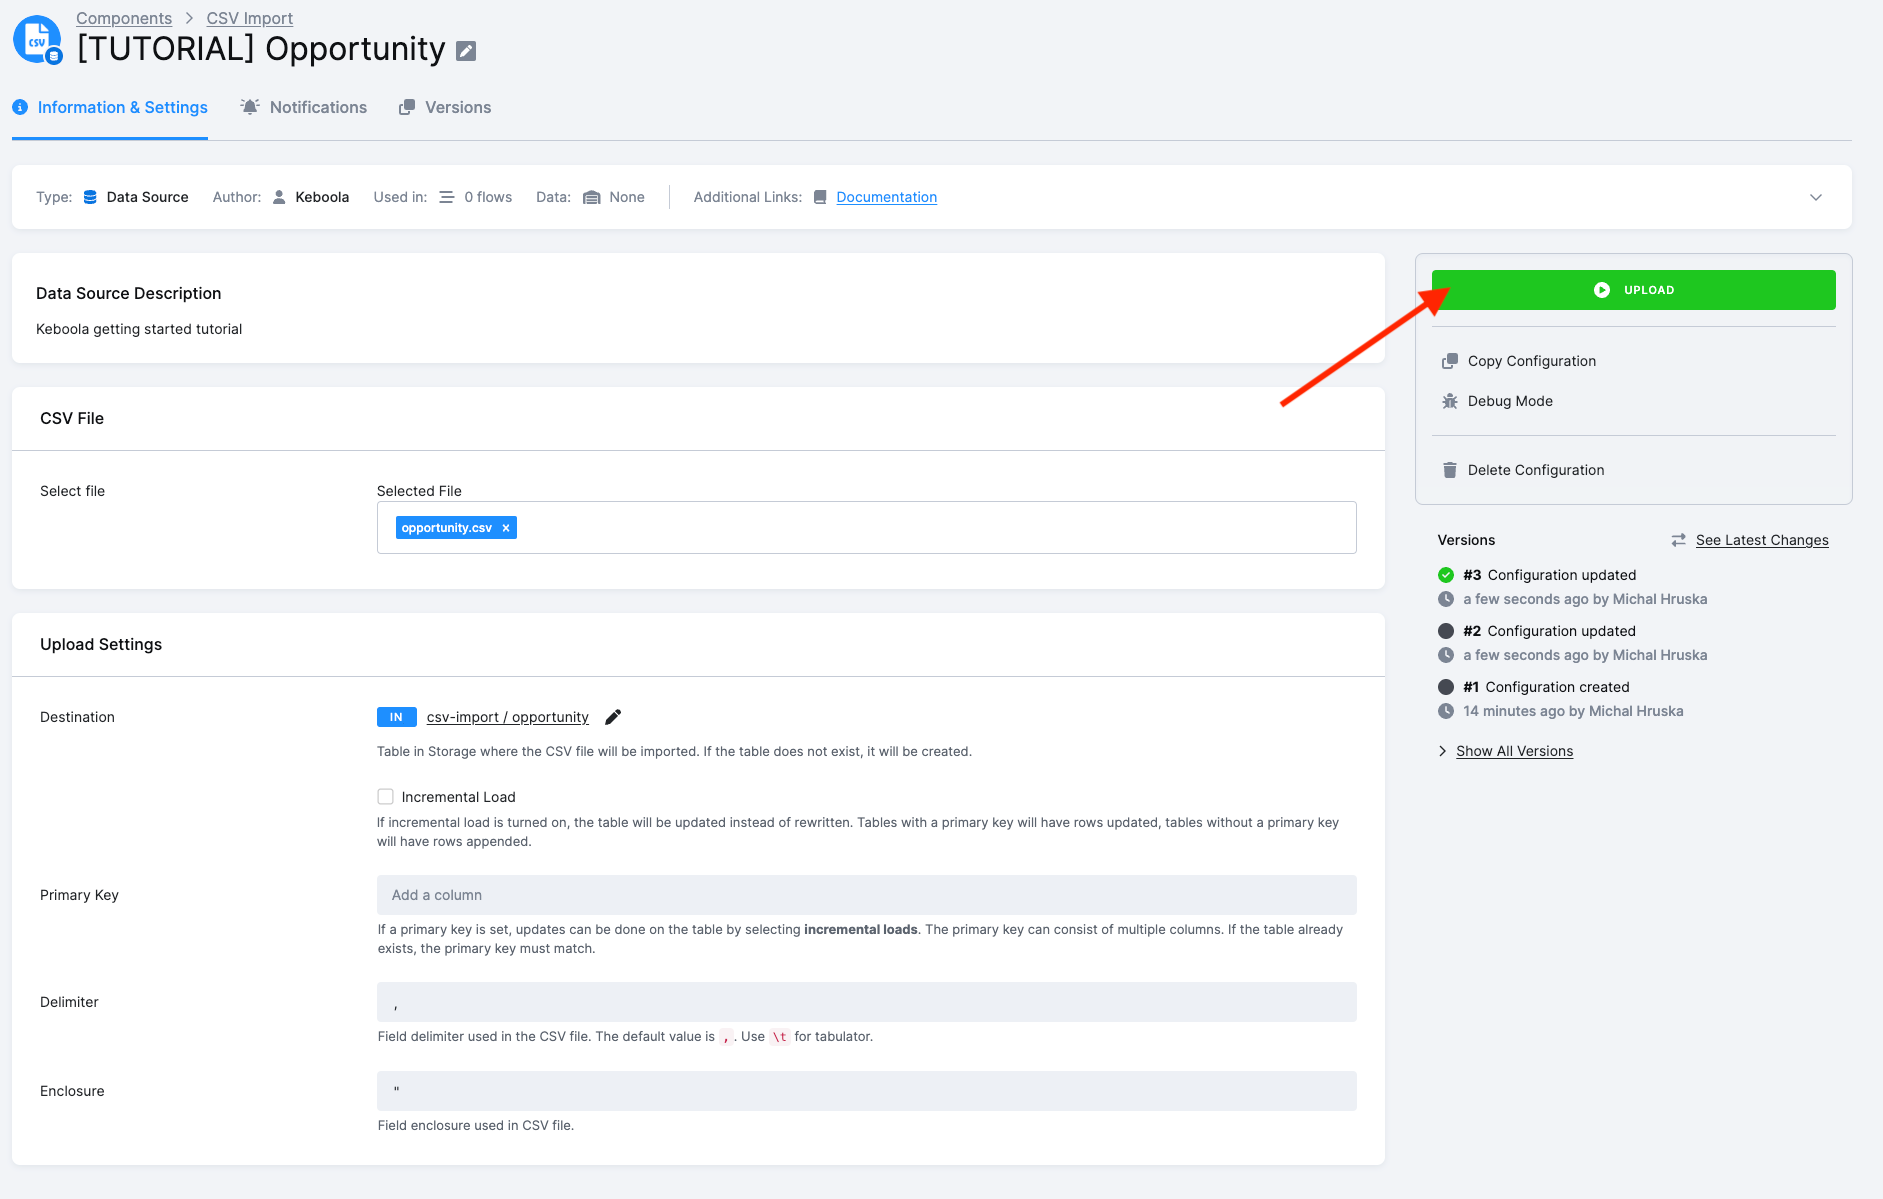
After the upload is complete, repeat the process for the remaining three tables—create a configuration, change the destination, and upload the respective file as requested.
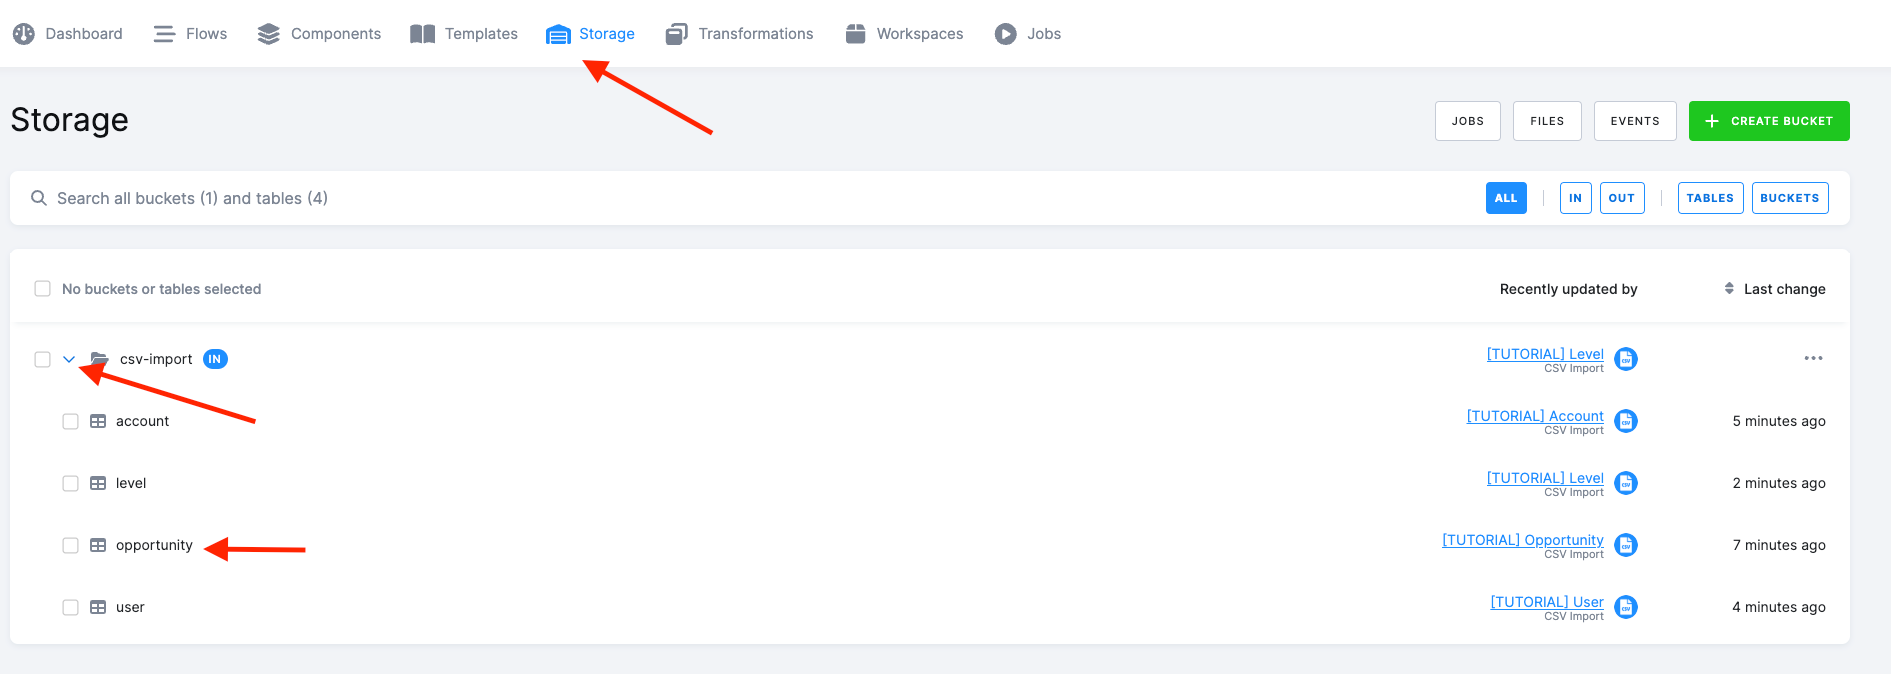
That’s it. You should now have four tables containing sample data stored in your Keboola Storage:
in.c-csv-import.opportunityin.c-csv-import.accountin.c-csv-import.userin.c-csv-import.level
To confirm the successful loading of all tables and review the data, navigate to the Storage section. Data is organized into buckets, and each bucket can contain multiple tables.
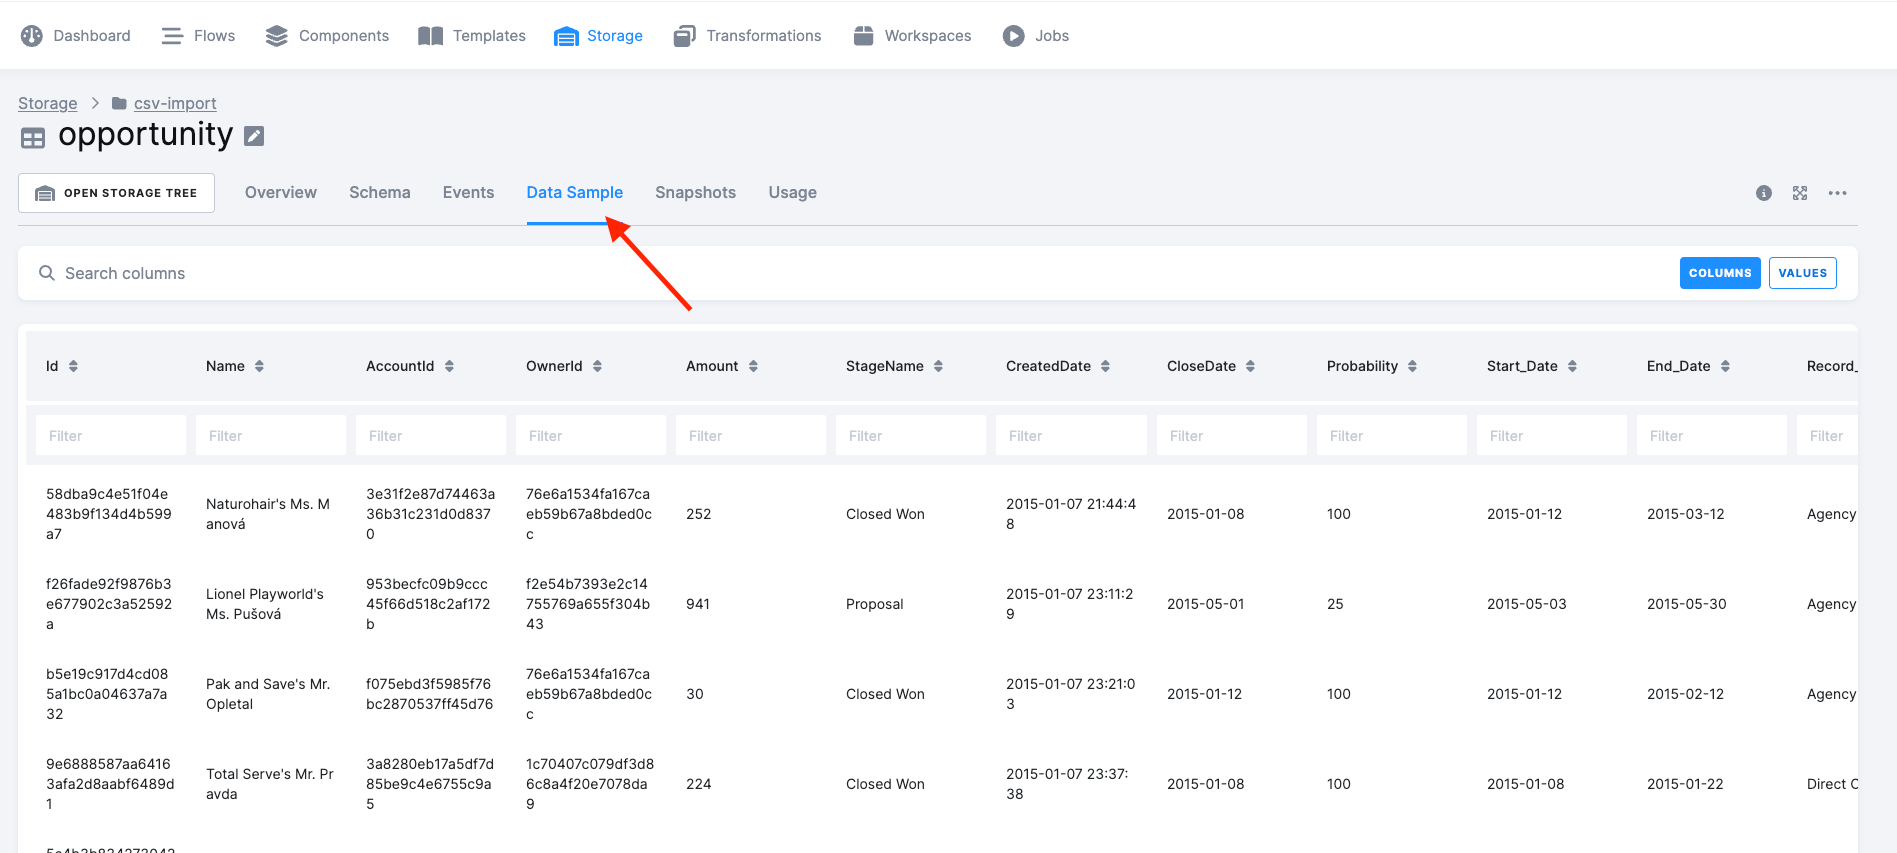
Expand each bucket to view its tables, and click a table name to access details, including the ‘Data Sample’ for that table.
What’s Next
Section titled “What’s Next”Proceed to Data Manipulation for the next step in the tutorial. Alternatively, take a brief side step to explore Loading Data with Google Sheets Data Source Connector and/or Loading Data with Database Data Source Connector.
If You Need Help
Section titled “If You Need Help”Feel free to reach out to our support team if there’s anything we can help with.